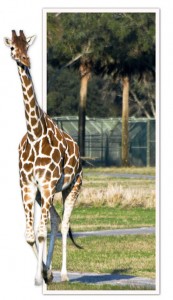
 In case anyone wants to create a pop-out image, similar to the one I posted on October 18, I am posting the How To directions. I also want to credit Matt Kloskowski, author of numerous books on Photoshop, including the excellent book Layers, where I found the pop-out idea (just last week an update of the book was published, featuring Photoshop CS5).
Pop-Out Photo
1. Choose a photograph depicting a figure, person or animal, in motion.
2. Make a selection of the figure, and put it on a new layer (CMD-J/Mac or ALT-J/PC). Name the layer FIGURE.
3. On the background layer, make a rectangular selection of the area that will be in the “photo” part of the pop-out. The selection should include part of the figure, but not the part that will be popping-out. Put the
selection on itʼs own layer and name it PHOTO 4.Select the background layer and fill with white.
5. On the PHOTO layer, double click the image icon in the LAYER PALETTE. The LAYER STYLES window will open. Click on STROKE, the last item in the left column (be sure to click on it so the STROKE dialog box appears in the center). Set the Size to 30 px, Position to Inside, and the Color to White. Do not click OK.
6. Select DROP SHADOW from the left column. Set the Blend Mode to Multiply, Opacity to 40%, Angle to 145°, Distance to 5 px and Size to 20 px. Click OK.
7. In the LAYERS PALETTE, Copy the DROP SHADOW to the FIGURE layer by holding the CMD/ALT key and dragging the DROP SHADOW effect from the PHOTO layer . There should now be a drop shadow in both layers.
8. In the FIGURE layer, right click (CMD-click on the MAC) on FX, which appears to the right of the of the icon in the LAYERS PALETTE. From the drop-down menu select CREATE LAYER (third from the bottom). A new layer is created below the FIGURE layer with only the shadow.
9.Select the new layer and choose the ERASER tool and set it to brush mode. With a soft brush, erase the part of the shadow that appears inside the PHOTO area.